
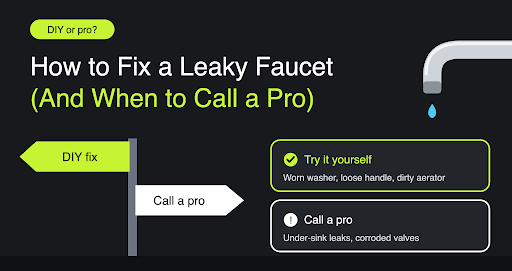
A dripping faucet is one of those small annoyances that’s easy to ignore. The sound fades into the background, and you tell yourself you’ll get to it eventually. But that steady drip is more than just irritating—it’s wasting water, driving up your utility bill, and potentially damaging your sink or countertop over time.
The good news is that many faucet leaks are simple to fix with basic tools and a little patience. The key is knowing what you’re dealing with and when a DIY repair makes sense versus when it’s time to bring in a professional.
Why You Shouldn’t Ignore a Leaky Faucet
Before we dive into repairs, let’s look at why that drip matters.
- Water waste: A faucet that drips once per second can waste more than 3,000 gallons of water per year. That’s enough to fill a large swimming pool.
- Higher bills: All that wasted water shows up on your monthly utility bill.
- Fixture damage: Constant moisture can corrode the faucet base, stain sinks, and even damage the cabinet below.
- Environmental impact: In a world where water conservation matters, fixing a leak is a small but meaningful step.
Common Causes of a Leaky Faucet
Faucets come in many styles—compression, ball, cartridge, and ceramic disk—but the underlying causes of leaks are often similar. Here are the most common culprits.
Worn-Out Washers
In compression faucets, a rubber washer sits against a valve seat to stop water flow. Over time, friction and minerals wear the washer down, causing drips.
Corroded Valve Seat
The valve seat connects the faucet to the spout. Sediment and water minerals can corrode it, leading to leaks around the base of the spout.
Damaged O-Rings
O-rings are small rubber rings that seal the faucet handle. If they wear out or become loose, water can seep out around the handle.
Loose or Worn Cartridge
Cartridge faucets rely on a movable cartridge to control water flow. If the cartridge is loose, cracked, or clogged with debris, it can leak.
Problems with the Aerator
Sometimes the leak isn’t from the faucet itself but from the aerator at the tip. A loose or damaged aerator can spray water or drip.
Tools and Materials You’ll Need
Before you start, gather these basic tools. Most are inexpensive and available at any hardware store.
- Adjustable wrench
- Screwdrivers (Phillips and flathead)
- Allen wrench set (for handle screws)
- Pliers
- Replacement washers, O-rings, or cartridges (specific to your faucet model)
- Plumber’s tape
- Vinegar or a descaling solution
- Old towels or a bucket
Step-by-Step: How to Fix a Leaky Faucet
The exact process depends on your faucet type, but the general steps are similar. Always turn off the water supply first.
Step 1: Turn Off the Water Supply
Look under the sink for the shut-off valves. Turn them clockwise until they stop. If you can’t find them, turn off the main water supply to your home.
Step 2: Plug the Drain
Place a stopper in the sink drain. Small parts like screws and O-rings are easy to drop, and you don’t want them disappearing down the pipe.
Step 3: Disassemble the Faucet Handle
- Pry off the decorative cap on top of the handle (use a flathead screwdriver).
- Remove the screw underneath.
- Pull the handle straight up. If it’s stuck, use a faucet handle puller.
- For cartridge faucets, you may need to remove a retaining nut or clip.
Step 4: Inspect the Parts
Once the handle is off, you’ll see the internal components. Look for:
- Cracked or worn washers
- Corroded valve seats
- Brittle or broken O-rings
- A dirty or damaged cartridge
Take photos as you disassemble so you can reassemble correctly.
Step 5: Replace or Clean the Damaged Parts
- Washers: Replace with a matching new washer.
- O-rings: Swap in new ones. Coat them with plumber’s tape or silicone grease for a better seal.
- Cartridge: If it’s clogged with mineral deposits, soak it in vinegar. If cracked, replace it.
- Valve seat: Clean with vinegar or replace if corroded.
Step 6: Reassemble and Test
Put everything back together in reverse order. Turn the water supply back on slowly. Let the faucet run for a minute, then check for leaks. If it still drips, you may have missed a worn part or installed something incorrectly.
When to Call a Professional Plumber
DIY repairs are satisfying, but some situations call for an expert. Consider hiring a licensed plumber if:
- The leak persists after you’ve replaced the obvious parts.
- You have low water pressure throughout the house, which could indicate a deeper issue.
- The faucet is a specialty or high-end model with hard-to-find parts.
- You notice corrosion or rust inside the faucet body.
- You’re uncomfortable working with plumbing tools or don’t have the time.
- The leak is coming from behind the wall or under the sink, not the faucet itself.
If you’re in the Isanti area and need help to fix a leaky faucet in Isanti, a professional can diagnose the problem quickly and ensure the repair lasts. Sometimes a simple fix is all it takes, but other times a persistent leak signals a bigger plumbing issue that should be addressed before it worsens.
Preventing Future Leaks
Once your faucet is fixed, a little maintenance goes a long way.
- Don’t overtighten the handle—it can damage washers and O-rings.
- Wipe down the faucet after use to prevent mineral buildup.
- If you have hard water, consider a water softener to reduce scale.
- Check under the sink periodically for signs of moisture or corrosion.
- Replace worn parts as soon as you notice a drip.
Fixing a leaky faucet is a manageable DIY project for many homeowners and business owners. With the right tools and a bit of patience, you can stop the drip and save water. But when the repair becomes complicated or the leak keeps returning, it’s wise to call in a professional.
Companies like Fix Mechanical handle these repairs every day and can help you avoid costly water damage. Whether you tackle it yourself or bring in an expert, don’t let a leaky faucet go ignored. Your wallet—and your plumbing—will thank you.